How to use manual for JoinFS
JoinFS Quick Start
- Click ‘Download’ on the top of this page and Download to save JoinFS on your computer.
- Open the downloaded file and follow the instructions to install JoinFS.
- Launch your flight simulator.
- X-Plane only – you must start a flight so that JoinFS can connect.
- Launch JoinFS.
- The first time you launch JoinFS you will be asked to scan your simulator folder for existing models.
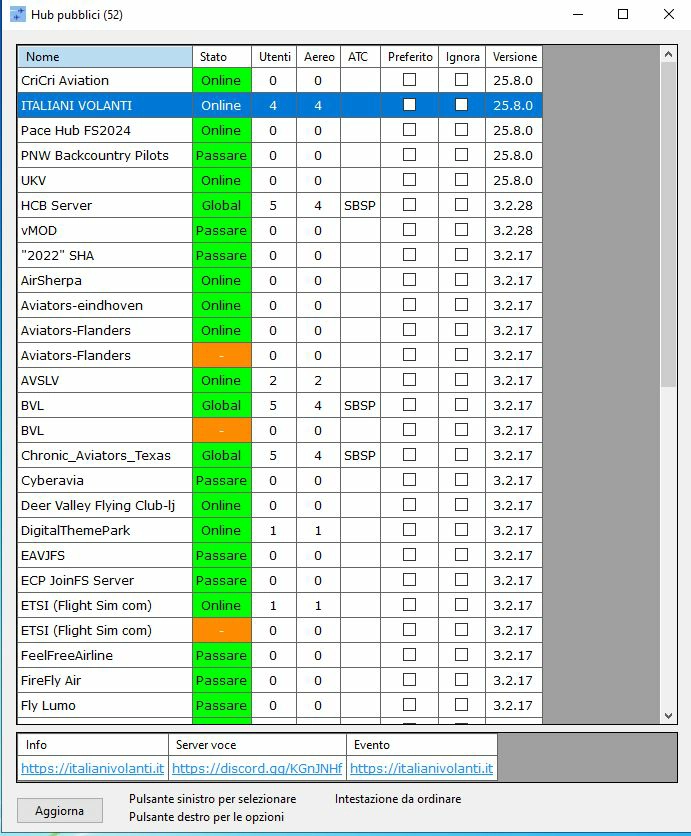
- Open the hub list from the menu ‘View>Public Hubs’. Click on a hub you would like to join. Right-click and select ‘Join’.
- Open the aircraft list from the menu ‘View>Aircraft’ to show a list of aircraft in the current session.
- If you with to change the model for any aircraft simply click on the aircraft in the list then right-click and select Substitute to choose a different model.
JoinFS is built with passion (and a lot of time). If you’d like to support the project, you can buy us a coffee with a PayPal donation.
Every contribution helps us improve and keep everything online. Thanks 🙌
JoinFS Connection Buttons
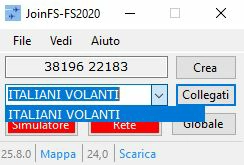
- Press the ‘Simulator’ button at any time to connect or disconnect the simulator.
- Press the ‘Network’ button to join the specified address or if currently connected it will disconnect from the session.
Indicator Colours
Some JoinFS windows use colours to indicate current activity.
- ‘Active’ (green) indicates that something has successfully been activated. For example, a connection or injection of simulator objects.
- ‘Waiting’ (orange) indicates that something is being processed before becoming active. For example, in the process of connecting or waiting for objects to be injected.
- ‘Inactive’ (red) indicates that something is either not active or something has failed to become active. For example, an object failed to be injected into the simulator.
These indicator colours can be configured from the menu ‘File>Settings’.
Joining A Session
- You can join a JoinFS session by connecting to any of the participants in that session (it does not have to be the original creator). You may also join a special type of JoinFS instance called a hub. These are advertised and shown in the hub list, see ‘View>Public Hubs’. There are three ways to join a session:
- Enter the known address with optional port number.
- From the menu, select ‘View>Public Hubs’. In the hub list window, select a hub, right click and choose ‘Join’.
- From the menu, select ‘File>Address Book’, select a previously saved address, right click and choose ‘Join’.
JoinFS will always remember your previous connection so when launching JoinFS you can just click ‘Join’ to immediately connect to that session.
Information About The Session
- The number of pilots in the current session is displayed on the main interface.
- From the menu, ‘View>Session’ will show a list of the other nodes in the JoinFS session along with some routing information.
- From the menu, ‘View>Aircraft’ will show a list of the aircraft in the simulator. Showing callsign, model, a button to change the model and options for selecting which aircraft should be broadcast over the network, or recorded by the recorder.
- From the menu, ‘View>Monitor’ will show informative messages from JoinFS that may help resolve any problems.
JoinFS Hubs And Servers
JoinFS uses a peer-to-peer network topology. So by design there is no server or central controlling software. A single build of JoinFS can run anywhere on a private or public network such as the internet. JoinFS nodes communicate with each other as a group to form a session. However, you can configure your JoinFS node to be a special type of node called a hub. A hub is public and can be viewed by anyone by opening the hubs window from the menu ‘View>Public Hubs’. It is a convenient way to find new groups to fly with and provide common meeting places for established online flying clubs.
All hubs stay in contact with each other and maintain a distributed hub list. This hub list is automatically propagated between hubs and is updated for every JoinFS node. You can configure your own hub with a chosen name, information about the hub, details of an accessible voice server and some extra details about when group flights and events are likely to take place.
JoinFS uses minimal hardware and bandwidth resources so a hub can easily be run on any server or smaller device as required. Up to four hubs can be launched on the same machine and up to four hubs can be running behind the same router and internet IP address.
JoinFS Model Matching And Substitution
JoinFS allows you to substitute any aircraft model in the simulator for a different one. This has a number of advantages.
- If another person is flying an aircraft that you do not have installed then an alternative can be used.
- If another person is using a different simulator to you then an alternative is needed.
- If you want to display a different livery for a particular aircraft.
- If you want other people to see you in a different aircraft or livery to the one you are actually using – ‘Masquerading’.
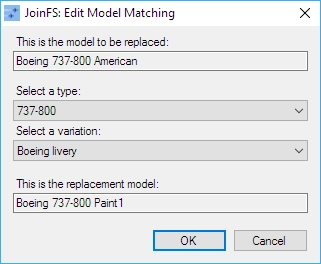
If you have not already done so, select ‘File>Scan For Models’ from the menu to build an internal list of available aircraft in your simulator. Further scans will be required when you install or remove add-on aircraft. If you use Tacpack from VRS Simulations, be sure to include the ‘Misc’ folder in the scan. This can be automated, every time JoinFS is launched, from the menu ‘File>Settings’ and the ‘Scan models at start’ option. A model can be changed at any time from the aircraft list, see menu ‘View>Aircraft’. Click on the aircraft then right-click and choose Substitute. You will be presented with the following form.
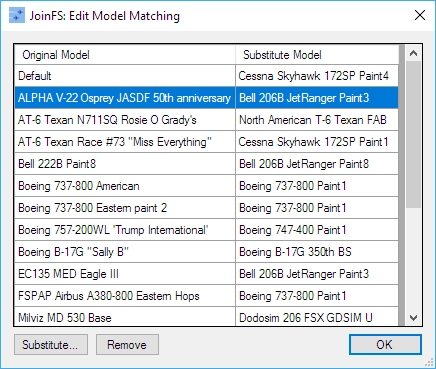
This form shows the model that is to be replaced at the top and the substituted model at the bottom. Use the two drop down list boxes in the middle to choose the type and variation of the replacement model. When confirmed by clicking the OK button, the models will be updated instantly in the simulator. JoinFS will remember all of your substitutions and at any time you can view and modify substitutions from the menu, ‘File>Model Matching’. You will be presented with the following form.
Default Substitutions
In the model matching window notice that there are a set of default substitutions for each aircraft typerole. For example, single propellor, twin propellor etc. You can change these defaults as required. The default models are used according to the following rules.
Substitution Rules
Every time an aircraft is injected into the simulator the following rules are followed, in this order, to decide which model is used to represent the aircraft.
- Substitution. If you have already configured a substitution for that model then it will use that. Aircraft list will show the suffix ‘(S)’.
- Exact Match. If you have the exact model and livery in your own simulator then it will use that. Aircraft list will not show a suffix.
- Automatic. Using the model name, JoinFS will attempt to find a similar name in the model list and use that. Aircraft list will show the suffix ‘(A)’.
- Default. The typerole default will be used. Typerole defaults can be configured from the menu ‘File>Model Matching’. Aircraft list will show the suffix ‘(D)’.
- Fallback. If all the above fail then the first entry in the model list will be used. Aircraft list will show the suffix ‘(D)’.
JoinFS Address Book
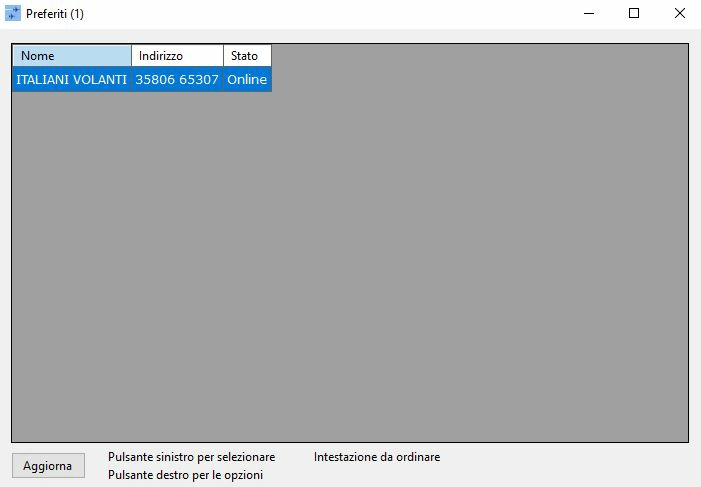
The address book ‘File>Address Book’ is where you can manage your saved addresses. This is ideal when you connect to another client or hub on a regular basis. For example, flying with a club or frequently with friends then adding an address allows you to quickly join up at any time. You can join a session, edit, remove or add an address using the right-click menu.
| Column | Description |
|---|---|
| Name | The name of this entry. For example a hub or friend’s name. |
| Address | The address for connecting to the session. Can be any of the addresses supported by JoinFS. |
| Status | Shows which addresses are actively online. A green ‘Online’ or ‘Online Hub’ means the remote client is active. Orange means they are not online or you are unable to connect. |
JoinFS Windows
There are several windows in JoinFS that provide useful information about what is currently happening on the JoinFS network. They can be opened from the ‘View’ menu on the main JoinFS window.
Public Hubs Window
Shows the list of known public hubs that other people are running, usually on a permanent server. The list includes information about the hub, how many clients are connected, how many aircraft and other objects are in the session. Click on a hub in the list and further details are shown in the box below the list. To join the hub, click the Join button below the details.
| Column | Description |
|---|---|
| Name | Name of the hub. |
| Status | Online status of the hub. A green cell with ‘Online’ means that the hub is active and can be joined. Orange means the hub is offline or cannot be contacted. |
| Users | Number of JoinFS clients connected to the session. |
| Aircraft | The total number of aircraft in the session. |
| ATC | If ATC is available the main airport code is shown. |
| Save | Click this box to add or remove this hub from the address book. |
| Ignore | Click this box if you do not wish to see this hub appear in the list. |
| Version | The version of JoinFS this hub is running. |
| About | A short description about activities at this hub. |
| Voice Server | Details of where to connect for voice communications. |
| Next Event | Details of the next group flight or even. |
Session Window
The session window shows details about all users in the current session. There is also an option at the bottom right of the window to show all users flying on the public hub network. It usually takes a minute or two for those public users to be updated. Users in your current session are updated more frequently and will show extra details.
| Column | Description |
|---|---|
| Nickname | The chosen nickname of the user. |
| Callsign | The callsign of the user’s aircraft. |
| Aircraft | The total number of aircraft that the user is broadcasting in the session. |
| Objects | The total number of carriers and other objects that the user is broadcasting in the session. |
| Permissions | Shows the current permissions that have been granted by you to this user. ‘C’ – allow cockpit entry, ‘F’ – they have flight control of your aircraft, ‘E’ – engine controls, ‘O’ – other controls. |
| Ignore | Click this cell if you do not wish to see any aircraft/objects from this owner in future. Objects from ignored people will not show in the list or in the simulator. |
| Port | Shows the remote network port that user is using. |
| ID | A unique number to identify the user. |
| Route | Shows the routing status. ‘Direct’ – there is a direct connection to the user, otherwise the ID of a user where the connection is being rerouted. |
| Connected | Is there an active connection to the user? |
| Latency | The total round trip time between your client and the user’s client. |
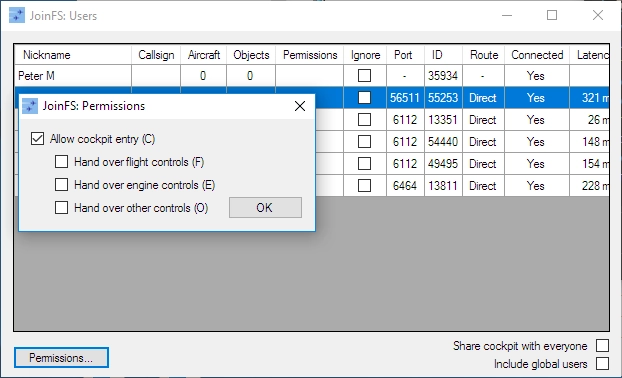
To edit the permissions for a user, click the Permissions button below the list.
Aircraft Window
The aircraft window shows details about all aircraft in the current session. There is also an option at the bottom right of the window to show all aircraft flying on the public hub network. It usually takes a minute or two for those public aircraft to be updated. Aircraft in your current session are updated more frequently and will show extra details.
| Column | Description |
|---|---|
| Callsign | Aircraft callsign. |
| Owner | The nickname/callsign of the owner of the aircraft. A JoinFS client can broadcast multiple aircraft over the network. Suffix: ‘(R)’ for recorded aircraft, ‘(A)’ for AI aircraft. |
| Model | The title name of the model used to represent the aircraft in the simulator. This can be changed at any time using the Substitute button below the list. Substitution suffix: ‘(S)’ for custom, ‘(A)’ for automatic, ‘(D)’ for default role-type. |
| Distance | Distance from your aircraft in the simulator. |
| Weather | Click on the cell to get regular weather updates from that aircraft. |
| Broadcast | Click on the cell for your own aircraft to enable/disable sending that aircraft across the network. If disabled then others will not see your aircraft. |
| Record | Click on these cells to determine which aircraft will be recorded when you start a recording/overdub. |
| Squawk | Transponder code. |
| Com 1 | Com 1 radio frequency. |
| Com 2 | Com 2 radio frequency. |
| Rules | Flight rules: IFR or VFR. |
| From | Departure airport code. |
| To | Arrival airport code. |
| Bearing | Where the aircraft is in relation to your aircraft. |
| Heading | Aircraft heading. |
| Altitude | Aircraft altitude. |
| GS | Ground speed of the aircraft. |
| Wind | Current wind strength and direction affecting the aircraft. In METAR format. |
| Ignore | Click this cell if you do not wish to see any aircraft/objects from this owner in future. Aircraft from ignored people will not show in the list or in the simulator. |
Objects Window
The objects window shows details about all other non-aircraft simulator objects available in the current session. From this window you can choose to broadcast objects across the network, for example, aircraft carriers or service vehicles. You can also see the objects that other people in the network are broadcasting.
| Column | Description |
|---|---|
| Owner | The nickname/callsign of the owner of the object. A JoinFS client can broadcast multiple objects over the network. |
| Model | The title name of the model used to represent the object in the simulator. This can be changed at any time using the Substitute button below the list. Substitution suffix: ‘(S)’ for custom, ‘(A)’ for automatic, ‘(D)’ for default role-type. |
| Count | If the objects are grouped by model type using the box at the bottom right then this column shows the total number of objects of that model type. |
| Bearing | Where the object is in relation to your aircraft. |
| Distance | Distance from your aircraft in the simulator. |
| Broadcast | Click on the cell for your own objects to enable/disable sending that object or model type across the network. If disabled then others will not see your object. |
| Ignore Owner | Click this cell if you do not wish to see any aircraft/objects from this owner in future. Objects from ignored people will not show in the list or in the simulator. |
| Ignore Model | Click this cell if you do not wish to see any objects of this model type. Objects of this model type will not show in the list or in the simulator. |
Sometimes the size of the object list can become overwhelming, so you can group them by clicking the option at the bottom right of the window.
Monitor Window
The monitor window is for diagnostics and debugging of JoinFS. It shows warnings and error messages and also information about operational events from JoinFS, such and connections being established and so on. There is an option below the output box that allows you to save the output to a file. Click the View Logs button to view the current and previous log files.
JoinFS Shared Cockpit
JoinFS includes its own method of sharing cockpits with other pilots. There is no restriction on which aircraft type you need to select when joining another cockpit. However, if your aircraft is significantly different then you are likely to experience some odd aircraft behavior. The advantage is that you can choose a similar type or aircraft by a different publisher and still be able to share the cockpit.
To enter the cockpit of another aircraft you must have permission from the owner of that aircraft. The exception is if you are entering a recorded aircraft that you own. The aircraft owner can allow you permission to enter the cockpit and can also hand over different sets of controls to different co-pilots. Controls are divided into three separate groups: ‘flight’, ‘engine’ and ‘other’. You can decide to hand over any or all of these groups.
JoinFS supports an unlimited number of co-pilots/passengers in one aircraft.
Procedure For Sharing The Cockpit
Pilot A wants to enter the aircraft of pilot B.
- Both pilots A and B run JoinFS and join the same session.
- Both pilots A and B choose the same aircraft in the simulator. (This is preferable but not enforced)
- Pilot B opens the user list from the menu, ‘View>Users’.
- Pilot B selects pilot A.
- Pilot B clicks the ‘Permissions…’ button.
- Pilot B ticks the ‘Allow cockpit entry’ option and the desired hand over options.
- Pilot B clicks OK to confirm.
- Pilot A opens the aircraft list from the menu, ‘View>Aircraft’.
- Pilot A selects pilot B’s aircraft.
- Pilot A clicks the ‘Enter Cockpit’ button.
- Pilot A and B are now linked and sharing.
- Further pilots can also join pilot B’s aircraft by using the same steps above.
Troubleshooting
If you have any problems connecting or seeing other objects, try the following checks:
- Check the main JoinFS window and make sure that both the ‘Simulator’ and ‘Network’ buttons are green. If any are not green, click the button.
- While connected to the simulator go to the menu and select ‘File>Scan For Models’. This will update JoinFS with the latest models in the simulator. It should report the number of models found. Make sure you add any other model folders that you have to the ‘Additional Folders’ box.
- Open the user list from the menu ‘View>Users’.
- Look at the list to make sure that you see everyone you expect to see.
- Look at the ‘Connected’ column – it should say ‘Yes’ and be green.
- Look at the ‘Ignore’ column – it should be unticked if you with to see that user’s objects.
- Open the aircraft list from the menu, ‘View>Aircraft’.
- Look at the list to make sure that you see all the aircraft you expect to see.
- Look at the ‘Distance’ column. See if the distance is what you expected. If it is not highlighted green, check the ‘Circle Of Activity’ setting from the menu ‘File|Settings’. Also make sure that the ignore option in the aircraft details, below the list, is unticked.
- Look at the ‘Model’ column. A letter in brackets after the model shows the type of substitution.
- You can quickly view any aircraft in the simulator, usually by right-clicking in the simulator window and selecting the traffic to view them. This will quickly allow you to see if an aircraft is there.
- If there are still problems then check the log window from the menu, ‘View>Monitor’. Look for anything unusual. If you need help with the log, click the save option, click ‘View Logs’ and contact the support forum.

